setting light parameters
Now we will create and place a light source.
Step 1: Create a light source object by clicking
on the light bulb in the tool window.
We will light the scene with a light source of type "Distant" which
is very easy to use.
For that, we have to change the type of the newly created light source:
Step 2: Go to the main window and click on the
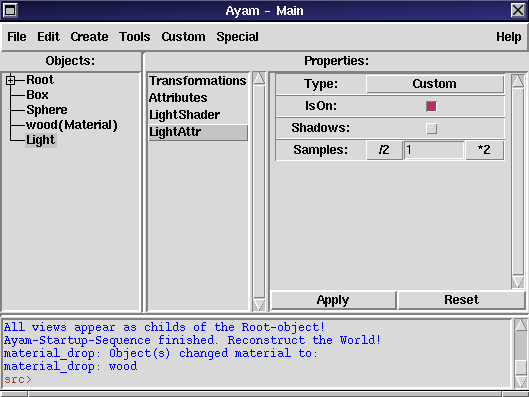
"LightAttr" entry in the
properties listbox. A new property GUI appears,
as displayed in figure 14:

setting light parameters
Step 3: Change the type of the light source using the
first entry (the "Type" menubutton) in the property GUI.
Change the type to "Distant".
Step 4: Press the "Apply" button.
The property GUI changes and display some new options,
related to the new type of the light source.
In the next step we enable shadow generation for our light source
(it is switched off by default!).
Step 5: Click on the "Shadows" checkbutton to turn it on.
Step 6: Press the "Apply" button. The light source is
now parameterized appropriately but it is lighting into the
wrong direction. We use the Transformations
property again to make the lightsource light by a -45 degree angle
down.
Step 7: Click on the "Transformations" entry in the
properties listbox. Change the "Rotate_X" entry to "-45"
and press the "Apply" button. We will check what we have done
by looking at the scene from the side in the next step.
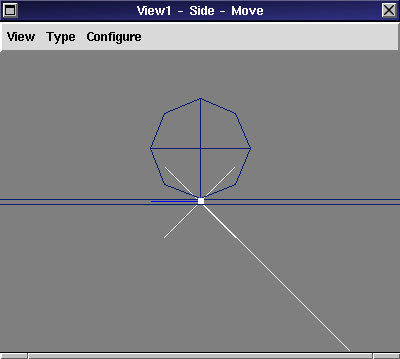
Step 8: Go back to the view window and switch its type to
Side using the shortcut <Ctrl-s>. It should show the
scene from the side as in figure 15:

side view
Do not worry about the fact that the light source seems to be located
in the origin of the scene. "Distant" light sources do not have a
distinctive point from which they are lighting. All that counts for
a "Distant" light is the direction and thus our light is now
parameterized correctly and we may render the scene in the next
section.